Hover Domain Authentication

Authenticating your domain is a trust mechanism, it tells the inboxes of your subscribers that Transpond is allowed to send as your domain and so they will let the emails through.
Authenticating your domain requires making some small changes to your DNS settings. Each DNS provider have slightly different options and this article will detail the specific steps and options you need if your domain is hosted with Hover.
There are a total of five DNS records that are important to ensure you get the best deliverability when using Transpond:
- SPF
- DKIM
- DMARC
- Tracking domain
- CDN domain
Most domains have an existing SPF record, and if that's the case you would edit the existing one rather than creating an extra one. You should only ever have one SPF record per domain.
To add and update your DNS records:
- Login to your Hover domain control panel.
- Click on DNS at the top of the page with your domain info.
- Use the ADD A RECORD button to create a new record. f you have an existing SPF record then make sure to edit it, and include just the
include:spf.ourmailsender.compart of it in the Value/Target.

Setup the DKIM record
- Select CNAME Record record from the 'Type' drop down.
- In the 'HOSTNAME' field, enter
mp1._domainkey - In the 'TARGET NAME' field, enter
dkim.ourmailsender.com - Click the ADD RECORD to save the record.

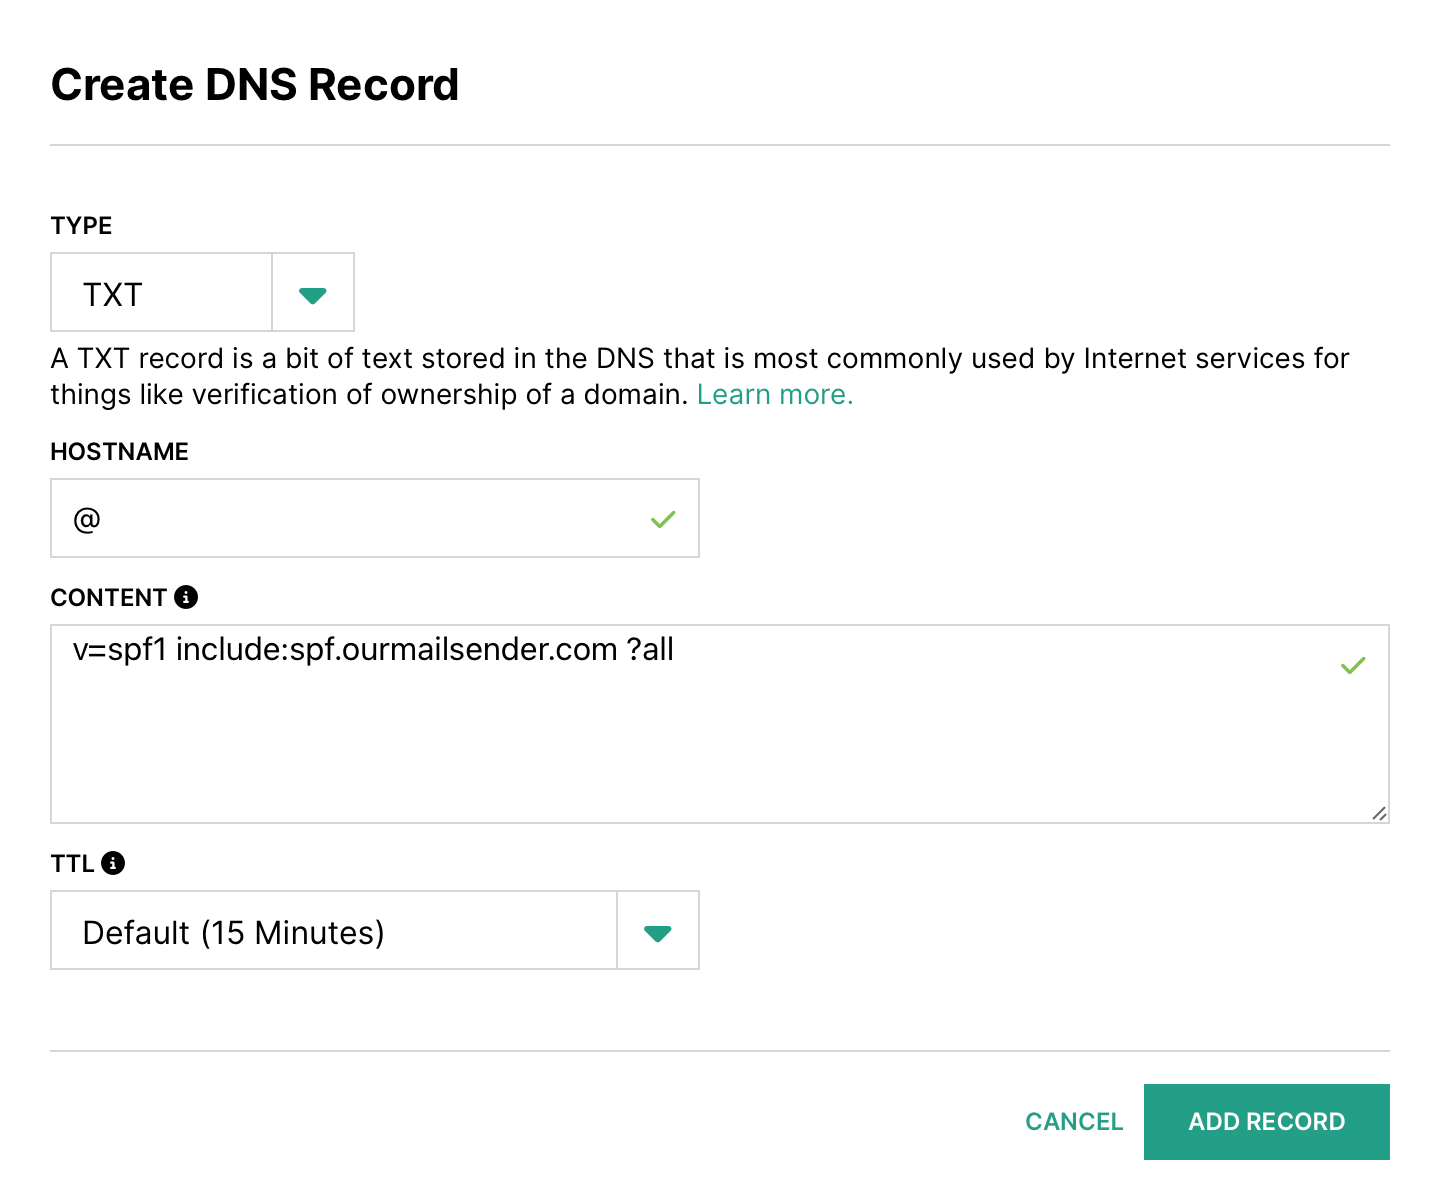
Setup the SPF record
- First look to see if you have an existing SPF record or not. It will be a TXT record that starts with
v=spf1. If you do, click to edit the Value for the existing one and move on to step 5. - If you don't have an existing one, click to Add new record
- Select TXT Record from the 'Type' drop down
- In the 'HOSTNAME' field, enter
@ - In the 'Content' field,
- if creating as new SPF record, enter
v=spf1 include:spf.ourmailsender.com ?all. - If editing an existing SPF record, just add
include:spf.ourmailsender.comat the end, before the part that says?all.
- if creating as new SPF record, enter
- Click ADD RECORD to save the changes.
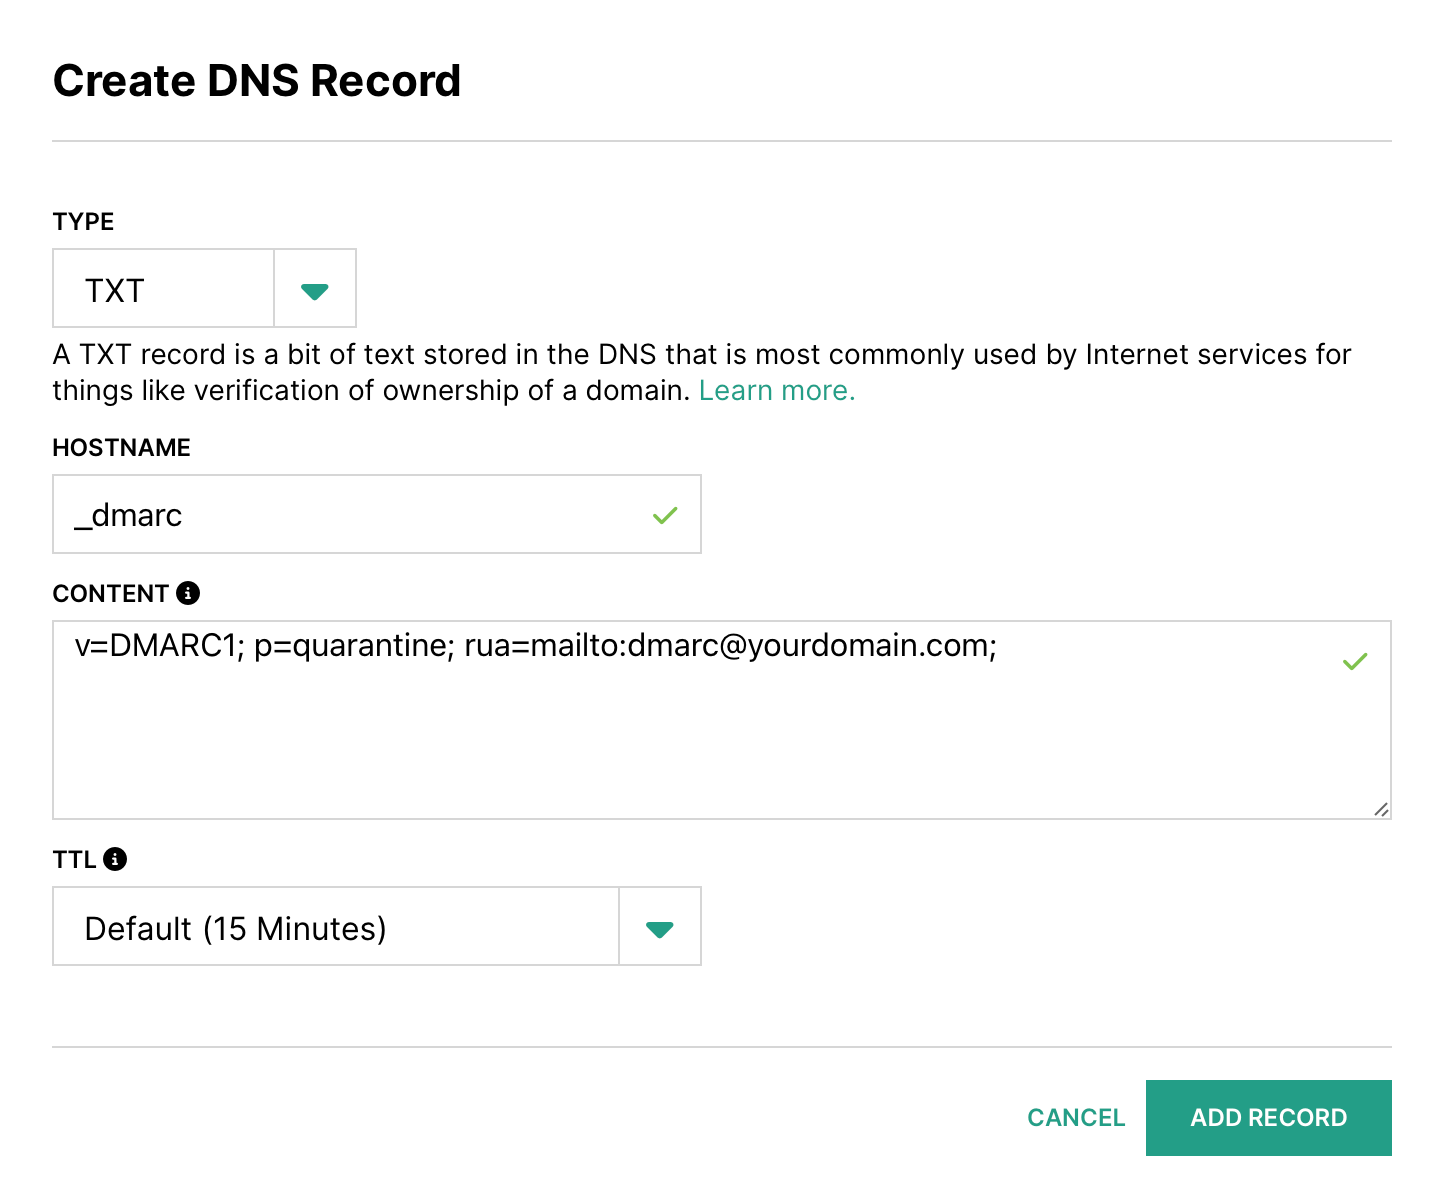
Setup the DMARC record
- Select TXT Record from the 'Type' drop down.
- Enter
_dmarcin the HOSTNAME field - Add your DMARC record in the 'Content' field. It normally starts with
v=DMARC1; p=.... If you haven't yet generated a DMARC record then you can use one of the free tools online to set one up, such as DMARC Generator: https://dmarcgenerator.com - Click ADD RECORD to save the changes.
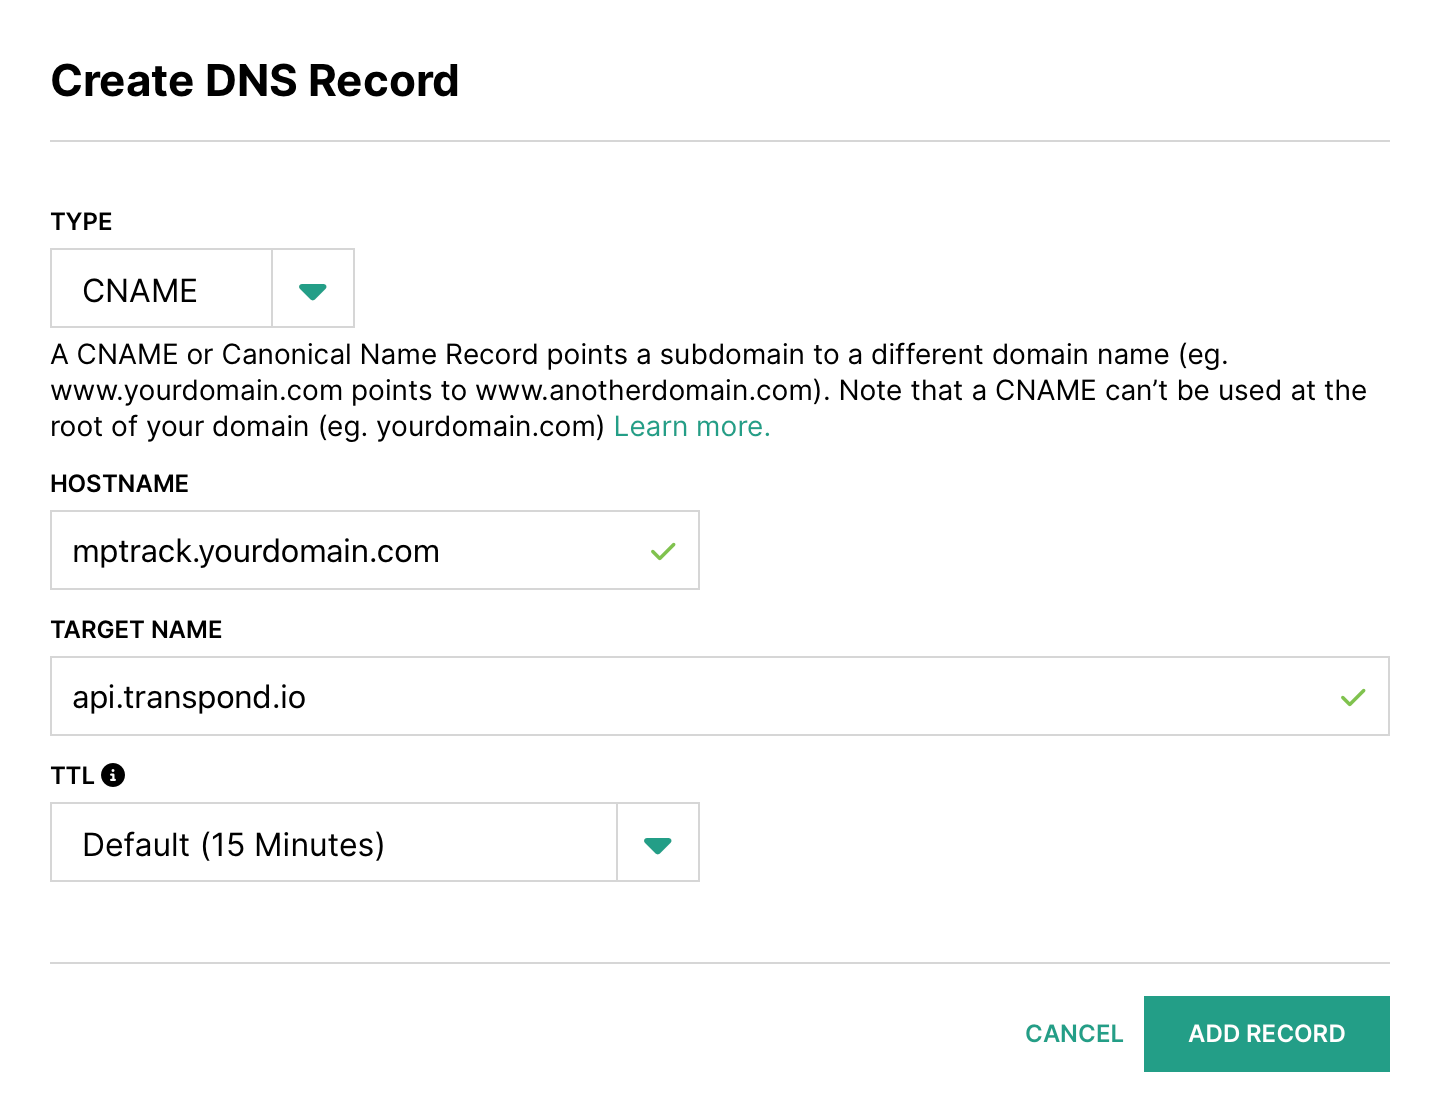
Setup your Tracking domain record
- Select CNAME Record from the 'Type' drop down.
- Enter
mptrack.yourdomain.comin the HOSTNAME field. Replace yourdomain.com with your own domain. - Add
api.transpond.ioin the TARGET NAME field. - Click ADD RECORD to save the changes.
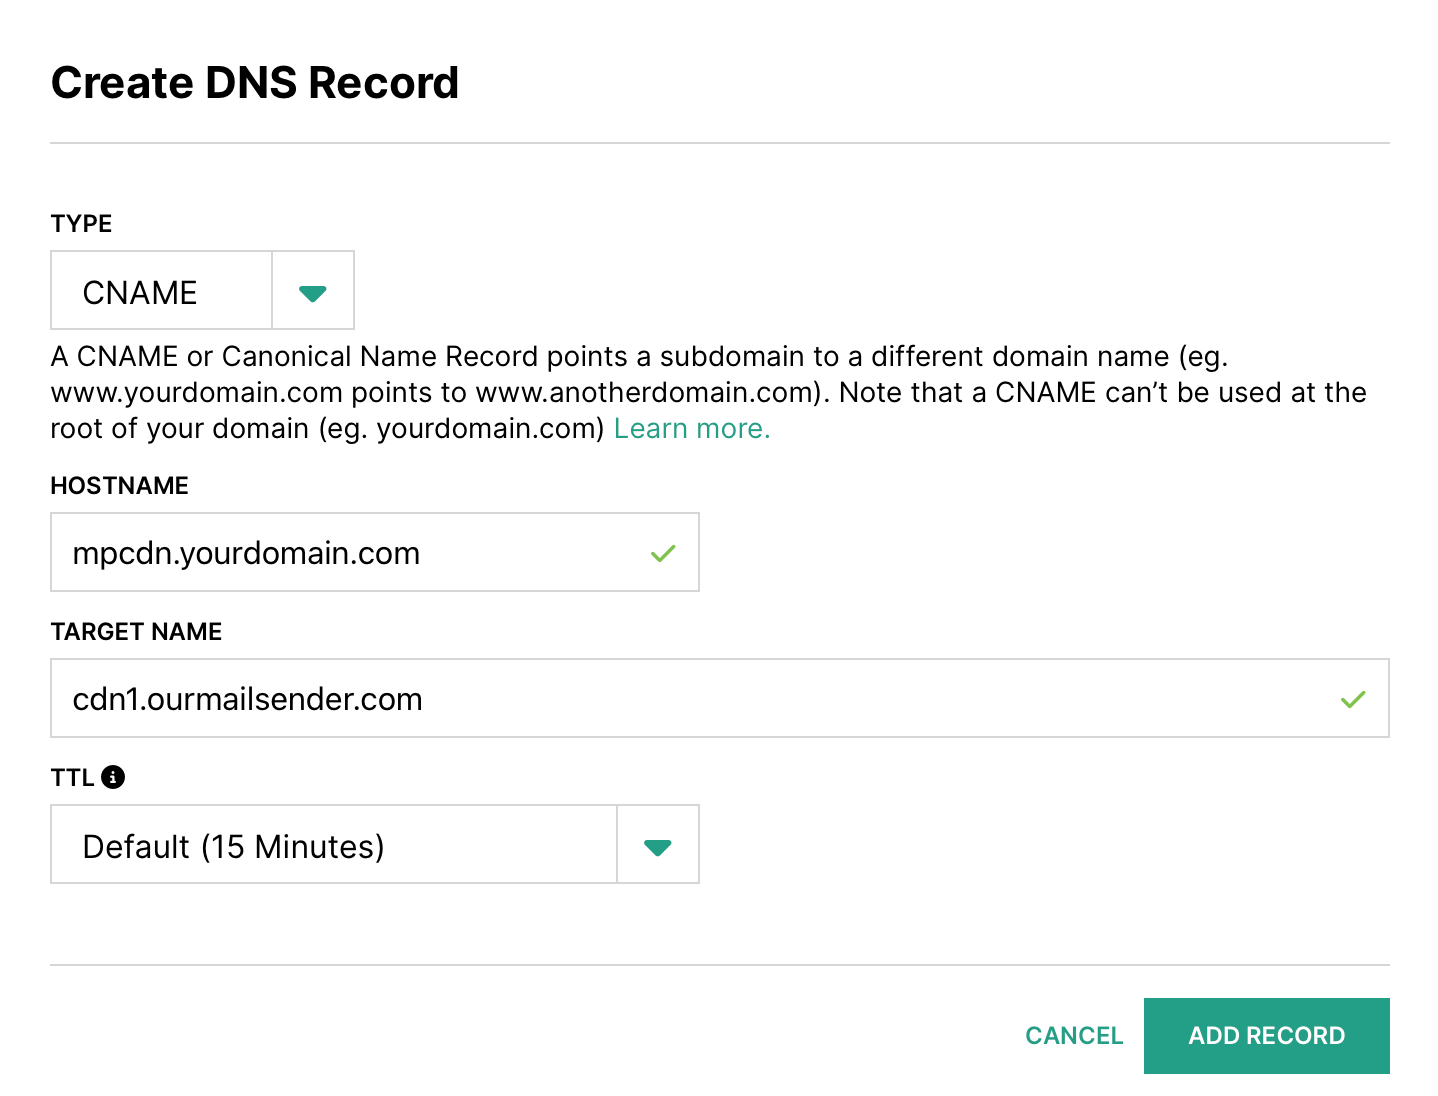
Setup your CDN domain record
- Select CNAME Record from the 'Type' drop down.
- Enter
mpcdn.yourdomain.comin the HOSTNAME field. Replace yourdomain.com with your own domain. - Add
cdn1.ourmailsender.comin the TARGET NAME field - Click ADD RECORD to save the changes.
Record list for reference
Below is a list of the types of records you need to create or edit.
| Type | HOSTNAME | TARGETNAME/Content |
| CNAME | mp1._domainkey | dkim.ourmailsender.com |
| TXT | @ | v=spf1 include:spf.ourmailsender.com ?all |
| CNAME | mptrack.yourdomain.com | api.transpond.io |
| CNAME | mpcdn.yourdomain.com | cdn1.ourmailsender.com |
| TXT | _dmarc | v=DMARC1; p=... |
Make sure to replace yourdomain.com with your own domain.